
Some soapmakers prefer the "melt and pour" process to make bar soap because it is rather simple and safe. This method is often used for small-scale (domestic) and large-scale (commercial) manufacturing.
In this blog, we take a closer look at the advantages and disadvantages of melt and pour soap making. We'll also talk about how melt and pour soap differs from cold process soap.
What Is Melt and Pour Soap Making?
Melt and pour is not actually making soap. It's crafting bar soap by melting the pre-made soap base, customizing it with different colors, fragrances, and additives, and pouring it into shaped molds to cool and solidify. It's a good method for beginners who would like to create hand-made soap for fun because it's simple and offers opportunities for creativity.
Melt and pour soap bases are made via saponification with a combination of ingredients used in traditional soaps (oils and lye) and with an added sugar alcohol blend to create transparency. Extra glycerin is often added to help keep a soap base soft and meltable, making it easy to work with. That's why melt and pour soap is often called glycerin soap.
Glycerin soap doesn't require any cure time and is ready to use as soon as it hardens within the mold. But it won't be as long-lasting as fully cured cold process soap. Besides, glycerin is a humectant, which draws moisture from the air, so it can cause the soap to sweat in humid climates.
Cold Process Soap vs. Melt and Pour
The cold process is the most common type of soap making. It involves making soap from scratch using organic oils and lye and adding essential oils and herbal additives. This traditional method is time-consuming because it requires time for curing, but it allows soap makers to have complete control over the quality of the ingredients used. And the final product is a beautiful, long-lasting soap that is very gentle on the skin.
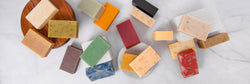
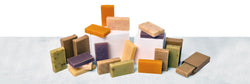
That's why at Botanie Soap, we always use the cold process method for making all-natural bar soap. The collection that we offer for private label use includes a range of varieties that look and smell great.
How to Make Melt and Pour Soap
Pre-made melt and pour soap base is usually sold in blocks. It has already gone through saponification, so working with lye is not required. To give an idea of how to make melt and pour soap, here are the essential steps in the process that soapmakers usually follow:
- Cut the necessary amount of soap base into small chunks, put them into a heat-resistant container, and melt it using direct heat or a double boiler. It's necessary to watch the soap carefully to avoid overheating it.
- When the soap base is melted, add colorants, scents, and exfoliants and mix them thoroughly to prevent an uneven spread. Stir the base gently to prevent excess bubbles that can ruin transparency in clear soap.
- Once the desired additives have been thoroughly combined into the soap base, pour the mixture into silicone molds and place them on a level surface.
- Allow the soap bars to cool completely at room temperature. 4-6 hours will be enough for the soap in the molds to completely harden, and then it can be removed. Take it out of the molds, and it is ready to use right away.
- Wrap the bars tightly in non-porous packaging such as plastic wrap and store them in a cool, dry place. If a glycerin soap bar is not wrapped, it will be susceptible to sweating and shrinkage.
It's possible to mix together different melt and pour soap bases, create extremely clean, beautiful layers, embed smaller pieces of colored soap into bigger bars, and use other techniques to create custom soap designs. But soapmakers have no control over the base ingredients and can't customize the soap base formula. Saponification has already happened, so they can't choose the oils that go into the soap.
Cold process soap-making offers more possibilities for customization, and if you need a custom soap solution for your brand, you can rely on Botanie Soap to get it right. We can help you turn your ideas into market-ready products.
Melt and Pour Soap Problems
While melt and pour process offers great design possibilities, soapmakers may face some common melt and pour soap problems.
- Overheating—melt and pour soap base can get burnt at temperatures around 140-150 degrees Fahrenheit, which makes it thick, gloopy, and difficult to work with. So it's best to keep the soap temperature between 125-130 degrees.
- Separation usually occurs when making layered soap. When the bond between the lower level soap and the top layer soap is not tight enough to hold it together, the soap can separate as soon as you remove it from the mold or during use. To help soap layers adhere, it's necessary to pour the second layer while the first layer is cooled enough to have formed a skin on top. Also, it's important to use rubbing alcohol on the first layer before pouring the second one.
- Deformed soap—this happens when soap is left to solidify in the mold on an uneven surface. Melted soap is a liquid; like all liquids, it will find its own level. It will be warped when it solidifies if the surface is not leveled.
Skip the melt-and-pour entirely — we'll handle the soap.
Botanie's wholesale bases and ready-to-label bars ship the same week. No minimum on samples.
Order samples before committing to bulkFinal Thought
Melt and pour soap is one of the easiest ways to get into the hobby of soap making and a great craft to do with kids. Using a pre-made soap base, it's possible to experiment with scents, color, and attractive soap molds. Make and pour soap is also quick to make and doesn't need to cure. But because it contains extra glycerin, it's prone to sweating, so it's a slightly lower quality product than traditional cold process soap.